EC2 cloud profile
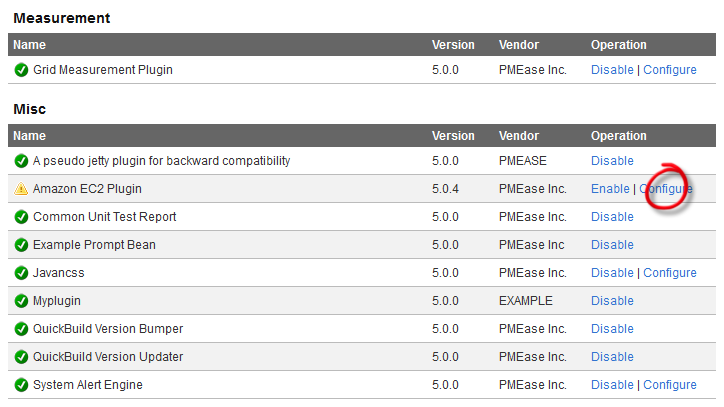
Cloud profiles rely on cloud providers to do its job. QuickBuild 5.0 ships with the EC2 cloud provider. To use it, one has to enable the EC2 plugin by providing a property file containing your EC2 access keys in Administration/Plugin Management page as demonstrated below:
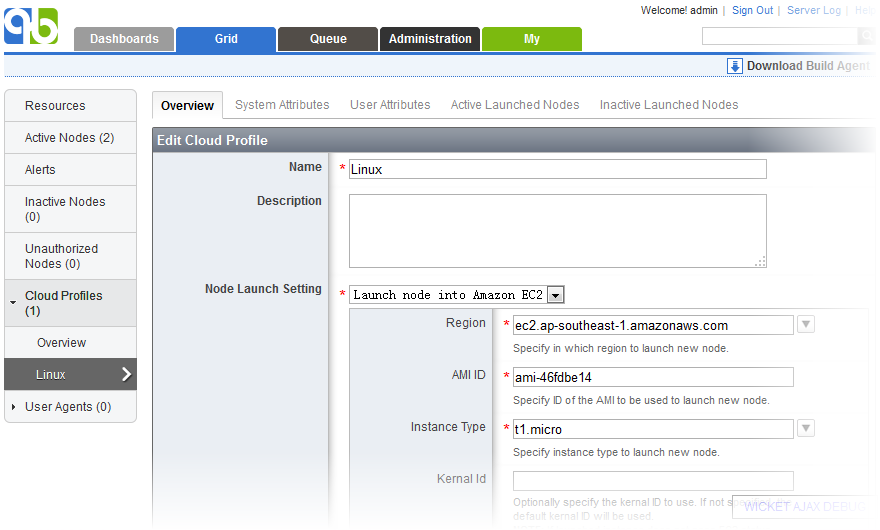
Then one can follow the cloud profiles guide to create cloud profiles using EC2 launchers like below:
Create build agent AMI
Besides launching node into public EC2 network, the EC2 plugin also provides the ability to launch node into EC2 virtual private cloud. Both launch settings requires the user to specify a AMI ID. The AMI should be pre-configured with your build environment as well as QuickBuild build agent. To configure a AMI with build agent, please do the following:
- Manually launch an instance of desired platform using your EC2 account, and install Java Runtime Environment version 7 or higher on the launched instance. You may also want to install other software required by your build to this instance.
- Download QuickBuild build agent package from Grid page, and upload it to launched instance above.
- Login to the EC2 instance and extract build agent package to your chosen agent installation directory.
- Edit file <agent install dir>/conf/wrapper.conf to define property wrapper.java.command to point to java binary if it is not in system path.
- Edit file <agent install dir>/conf/node.properties to configure QuickBuild server URL. You may also run <agent install dir>/bin/config.(bat|sh) to config node properties such as SSL setting. However this program requires GUI terminal, and if your console does not have that facility, you may run this program at your desktop to populate the node.properties, then transfer this file to launched instance.
- Edit file <agent install dir>/conf/attributes.properties to define necessary user attributes for the build agent.
- For Unix instances, edit file <agent install dir>/bin/agent.sh to uncomment below line and assign an OS user to run the agent in service mode.
#RUN_AS_USER=
The service user should own the agent installation directory.
- Run <agent install dir>/bin/agent.(sh|bat) install to install agent as system service.
- Edit security group associated with the launched instance to allow incoming connections to agent port.
- Restart launched node. After the system comes up, the build agent should be started automatically and will contact QuickBuild server to download necessary plugins. You may check file <agent install dir>/logs/console.log for the progress and possible errors.
- If agent starts up normally, you should be able to see this agent appears at unauthorized nodes list at grid page. Authorize the node and wait for a while to see if it can come active.
- If the agent comes active, create a EBS AMI for the launched instance and this AMI can then be used to define your cloud profiles to run certain builds. After build agent AMI is created, you may terminate the manually launched instance.
- You can certainly define multiple build agent AMIs for multiple cloud profiles to satisfy different build requirements.