Set up Plugin Development Workspace
- Make sure JDK version 1.8 or higher is installed on your development machine.
- Download QuickBuild for your platform and extract to a directory, say C:\quickbuild. Please note that QuickBuild binary distribution should be used here instead of source distribution.
- Make sure Eclipse Galileo (or higher) CLASSIC version is installed.
- Create a empty workspace directory to hold the plugin projects, and open Eclipse using this workspace.
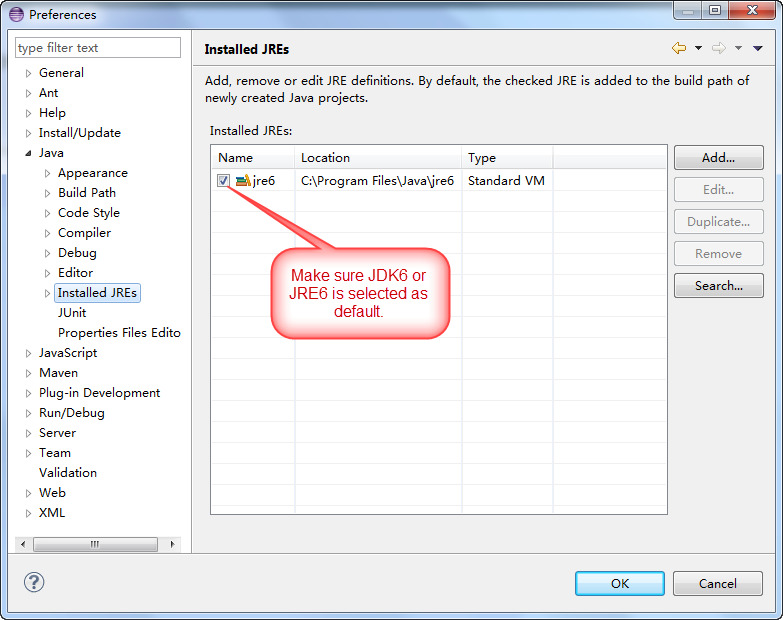
- Open Eclipse preference window and select menu Java->Installed JRE , make sure a JDK 1.8 or higher is available and selected as default JRE like below:
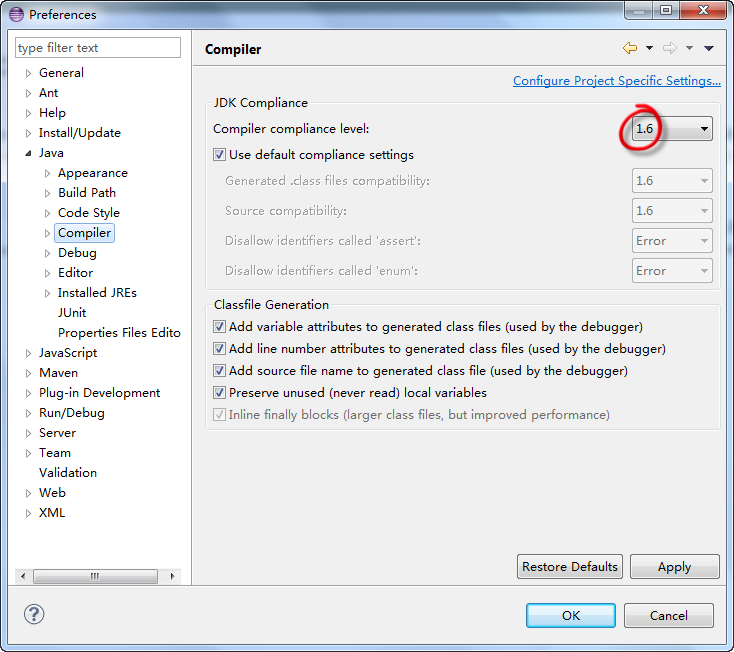
- Keep the preference window open, and switch to menu Compiler . Make sure the property Compiler compliance level is set to 1.8 as below:
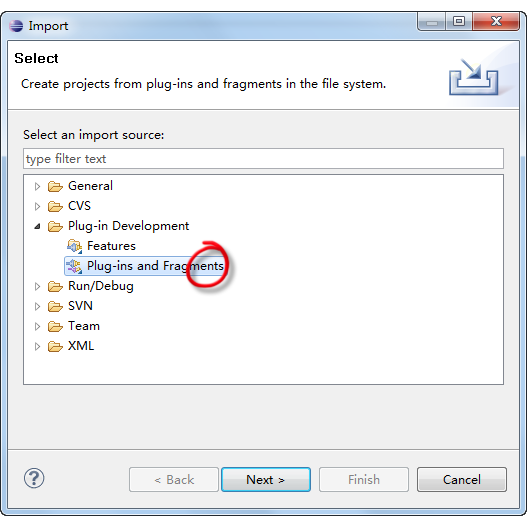
- From Eclipse, select menu File->Import , and import window will appear. Select Plugins and Fragments as import source like below:
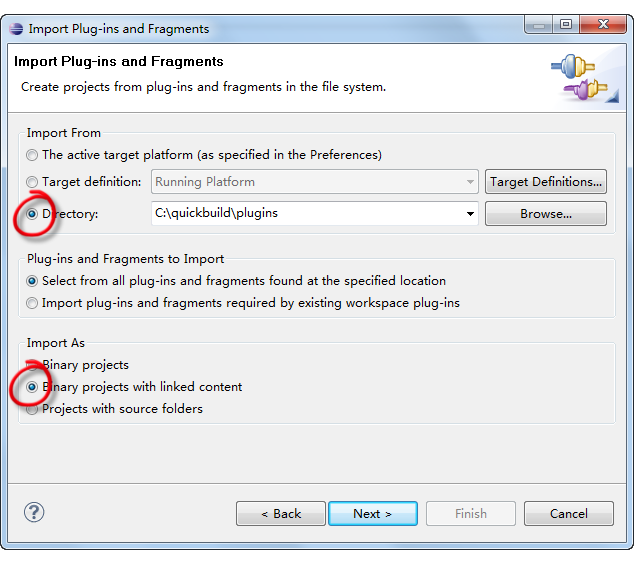
- Click next to bring out a dialog with a set of import options. Specify directory C:\quickbuild\plugins (change to other directory as necessary if you've installed QuickBuild to other place in step 3) as import directory, and select the Binary projects with linked content option like below:
- Click next and a dialog will be presented to let you select plugins to import. Select plugin com.pmease.quickbuild , com.pmease.quickbuild.bootstrap , com.pmease.quickbuild.equinoxadapter and com.pmease.quickbuild.plugin.report.engine like below:
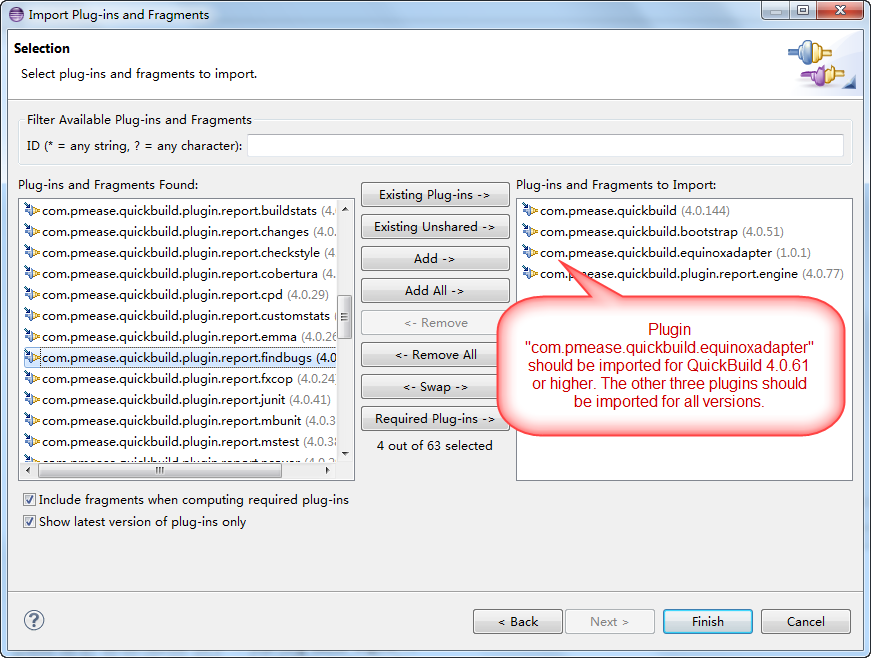
- Four QuickBuild projects will be imported into the workspace, respectively com.pmease.quickbuild , com.pmease.quickbuild.bootstrap , com.pmease.quickbuild.equinoxadapter (only necessary for QuickBuild 4.0.61 or higher), and com.pmease.quickbuild.plugin.report.engine . Check Eclipse problems view to make sure it does not report any warnings and errors. If there are errors, the most probable reason is that you've selected to import these plugins as binary projects instead of Binary projects with linked content in step 8.
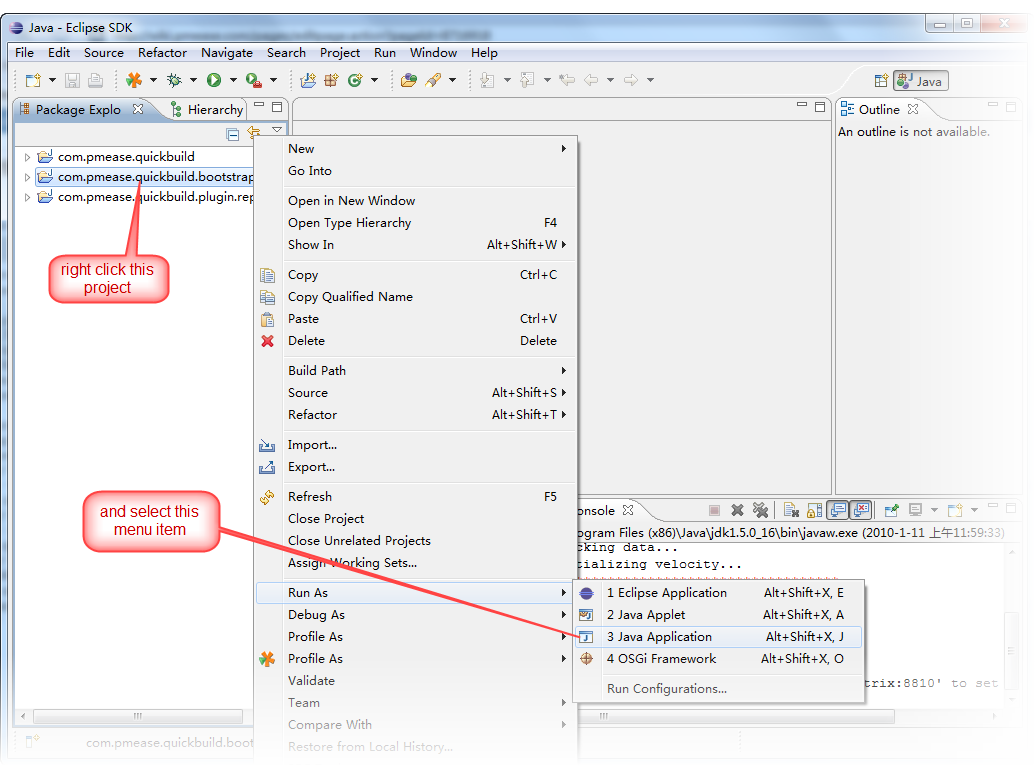
- From package explorer view, right click the project com.pmease.quickbuild.bootstrap , and select menu Run As -> Java Application from the popup menu as below:
- The select java application window will appear. From there, select Bootstrap and click OK like below:

- QuickBuild will be launched from Eclipse. Follow printed instructions to set up QuickBuild server if necessary. Make sure there is no any errors printed out in Eclipse console.
- Stop QuickBuild server. If you want to launch QuickBuild from Eclipse later, just run the configuration Bootstrap which should already be created. Now the plugin development environment has been set up successfully.