Write Your First Plugin
To start simple, we will create a plugin adding a "hello world" step to the step choice menu. A "hello world" message will be printed in the build log if this step is executed.
-
Open the plugin development workspace mentioned in the workspace setup page.
-
Create a new plugin project as demonstrated below:
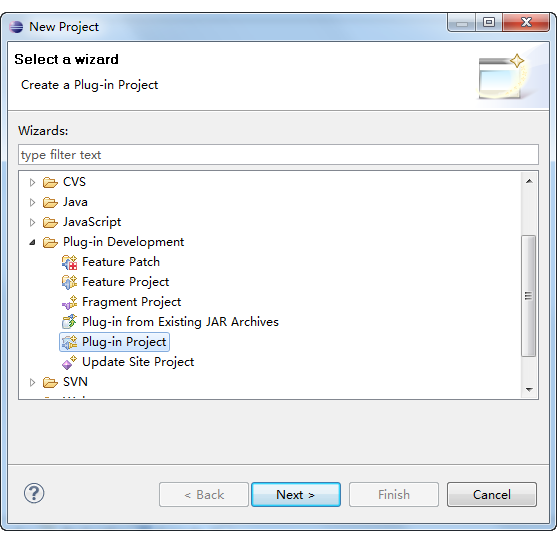
-
Click next to bring out the Plugin Project screen. Specify project name and select Equinox as target platform as shown below:
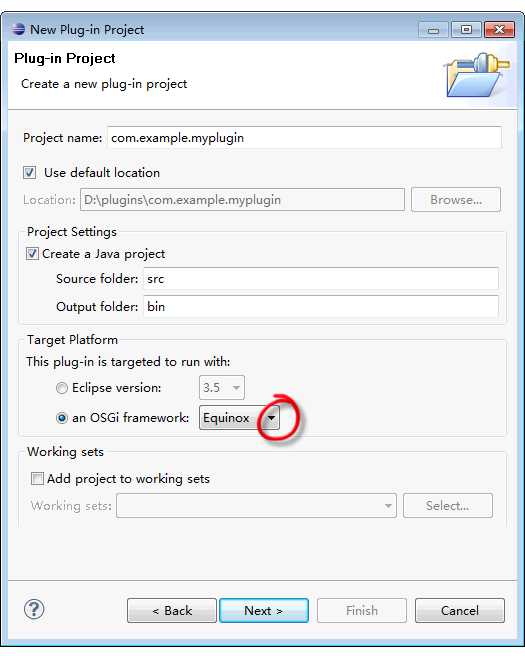
-
Click next to bring out plugin content screen. Fill various properties and click finish as below:
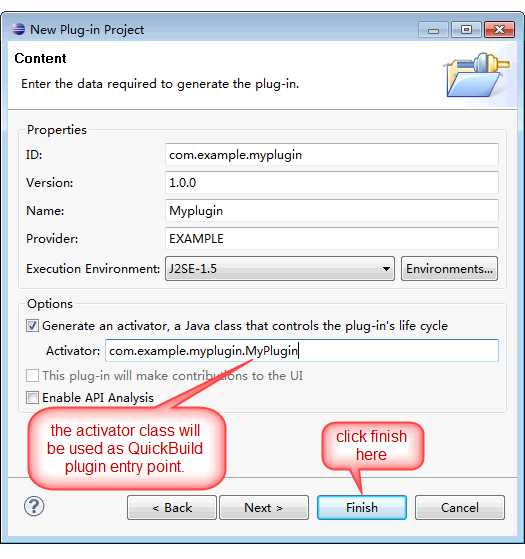
-
The plugin overview screen will be presented. Switch to dependencies tab and add plugin com.pmease.quickbuild as required plugins like below:
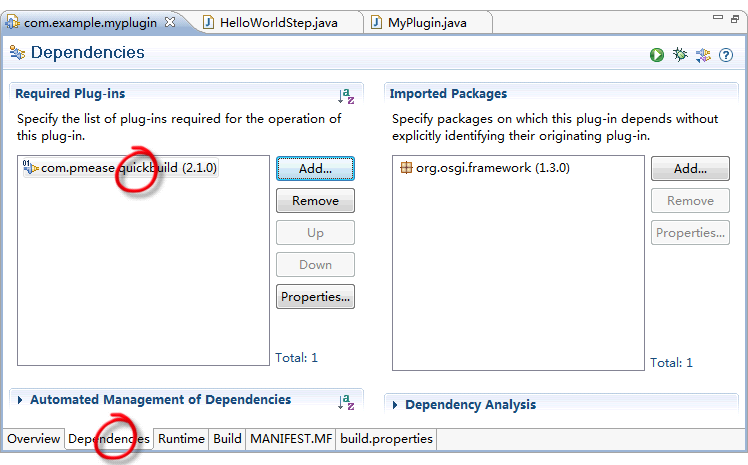
Press Ctrl-S to save the setting. -
Create a new class MyStep like below:
package com.example.myplugin;

import com.pmease.quickbuild.Context;
import com.pmease.quickbuild.annotation.Editable;
import com.pmease.quickbuild.stepsupport.Step;

@Editable(category = "examples", name = "say hello world",
		description = "This step simply prints \"hello world\" into the build log.")
public class MyStep extends Step {

	private static final long serialVersionUID = 1L;

	@Override
	public void run() {
		Context.getLogger().info("hello world");
	}

}
Here we define a step class and log a "hello world" messsage in its run method. The annotation @Editable provides some meta information about the step, such as its category, name and description. Refer to Working with Plugin UI for more information on how to control user interface by annotating classes.
infoPress F1 over the Step class (or any other framework classes defined in QuickBuild) will display its documentation since javadoc is automatically associated with the framework plugins when you set up the plugin workspace.
-
Open the class MyPlugin , and change it as below:
package com.example.myplugin;

import com.pmease.quickbuild.extensionpoint.StepProvider;
import com.pmease.quickbuild.pluginsupport.AbstractPlugin;
import com.pmease.quickbuild.stepsupport.Step;

public class MyPlugin extends AbstractPlugin {

	@Override
	public Object[] getExtensions() {
		return new Object[] {
			new StepProvider() {

				@Override
				public Class<? extends Step> getStepClass() {
					return MyStep.class;
				}

			}
		};
	}

}
Here class AbstractPlugin is defined in project com.pmease.quickbuild , and every plugin needs to extend this class. The getExtensions method returns an array of extensions, and each extension needs to extend an extension point defined in QuickBuild framework or other plugins. Here we extend the extension point StepProvider to provide a new step type. Open file <QuickBuild install dir>/plugins/com.pmease.quickbuild.bootstrap/javadoc.zip/com/pmease/quickbuild/extensionpoint/package-summary.html for all extension points defined in the framework.
-
{#WriteYourFirstPlugin-exportpackage} Save above classes, bring up the plugin manifest editing UI by double clicking file META-INF/MANIFEST.MF of the plugin, switch to the runtime tab and export all packages of the plugin like below:

-
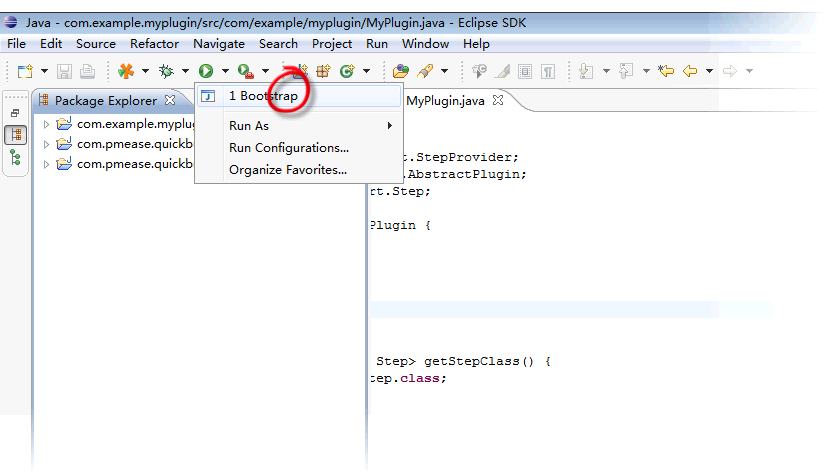
Now we've finished developing of our first plugin. Let's examine the result by launching QuickBuild through the Bootstrap configuration like below:
-
Open a browser and point to address http://localhost:8810_ (or any other port you've configured in file _<QuickBuild install dir>/conf/node.properties ). Set up the server if necessary, and select the root configuration in QuickBuild. Switch to steps tab and click the add icon at right side of the master step, you will be presented with below screen:
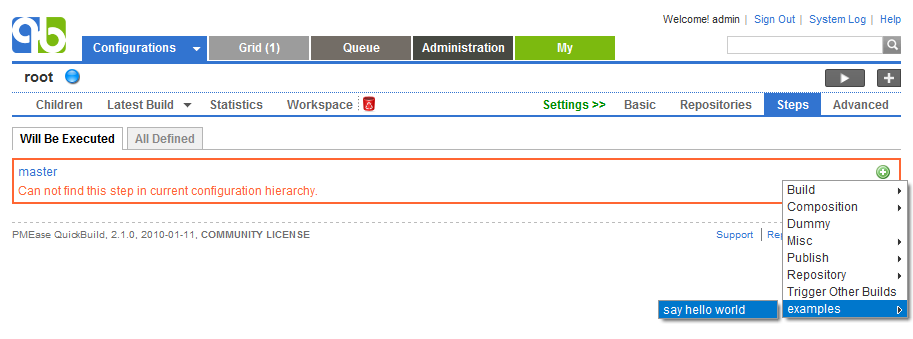
A new category examples appears in the step menu containing a new step type say hello world. Select this step and click save on the step definition screen. -
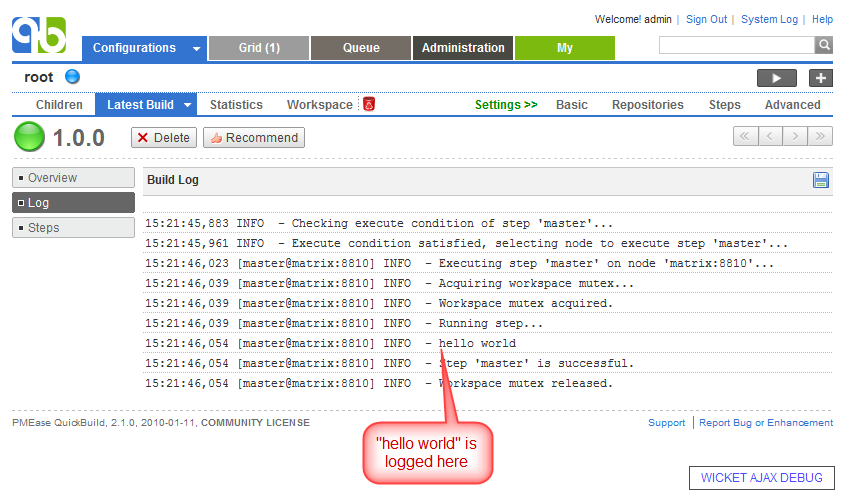
Click run button to run root configuration, a new build will be generated after a while. Select log tab of the newly generated build, you will find the logged "hello world" message like below:
-
After you've finished writing and testing the plugin, you can export the plugin to QuickBuild server's installation directory for production use. To do so:
-
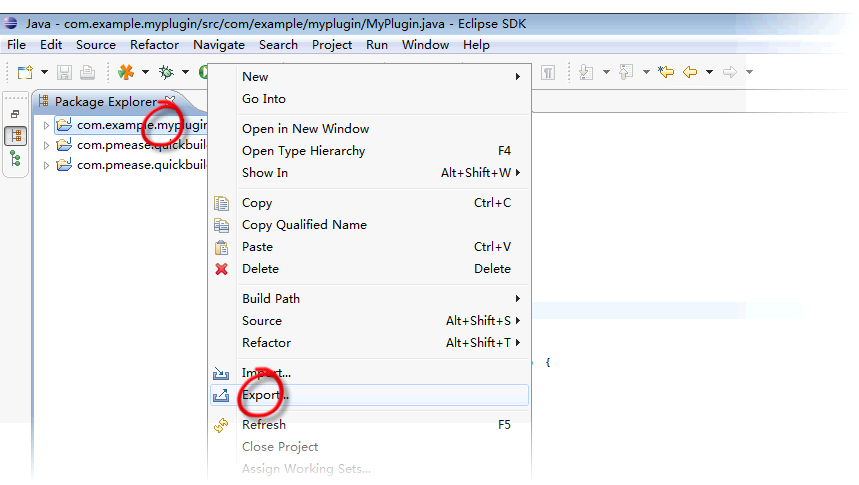
Right click desired plugin projects and select export menu item from the popup menu like below:
-
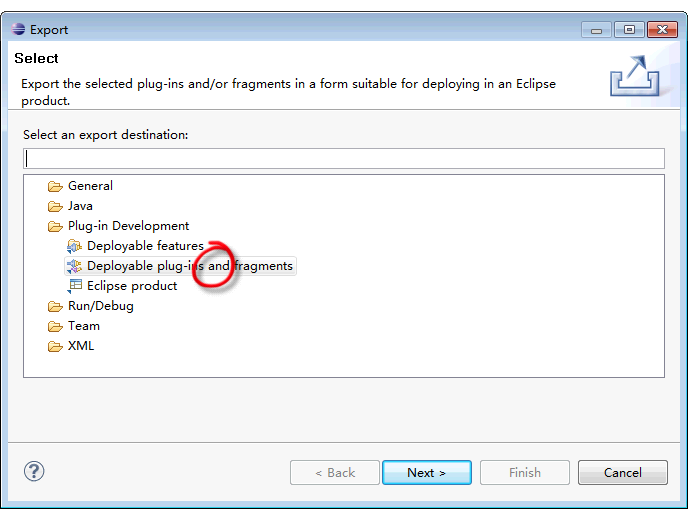
Select Deployable plugins and fragments in the next dialog like below:
-
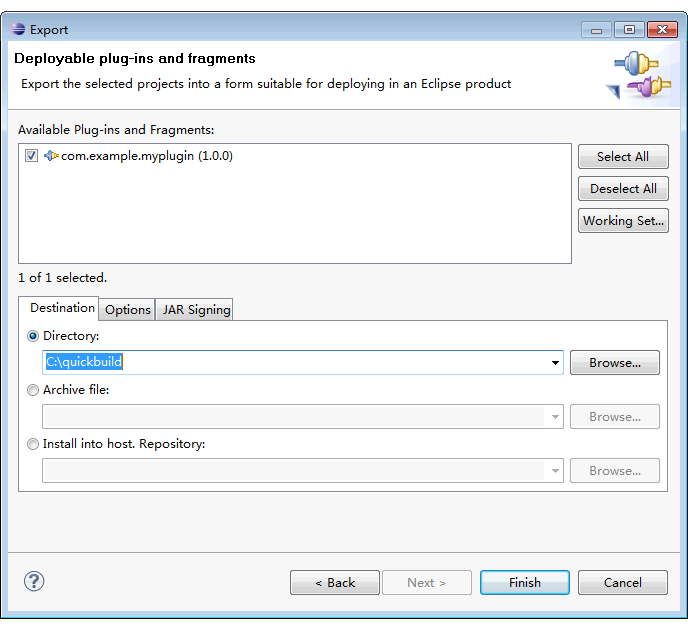
Click next, and specify QuickBuild server's installation directory in the next dialog as below:
-
Click the finish button, and the plugin will be exported to the plugins sub directory under QuickBuild server's installation directory. Now you can run command bin/server.(bat|sh) console to start QuickBuild outside of Eclipse, and the newly exported plugins will be loaded. The plugin will also be propogated to all connected agents automatically upon server startup.
infoExporting to QuickBuild server's installation directory is not mandatory, you can also deploy the plugin by exporting it to some other directories, and manually copy exported plugin to plugins folder under QuickBuild server's installation directory later.
-
-
{#WriteYourFirstPlugin-headlessbuild}To build plugin in headless mode:
-
Make sure you have Ant installed.
-
Place all your plugin projects in a directory, and copy file <QuickBuild server install dir>/dev/plugin/samples/build.xml to that directory. The directory should then look like this:
build.xml
com.example.myplugin
com.example.anotherplugin -
Open a command prompt window and change to that directory. Define environment variable QUICKBUILD_HOME to point to installation directory of QuickBuild.
-
Run command ant to build the plugins. If successful, you will find your plugins packaged in sub directory stage/plugins.
-
You may run command ant clean to optionally clean generated directories and files.
-