Working with GitHub
QuickBuild integrates with GitHub via the GitHub repository. This repository has all features of a normal Git repository, but add the ability to build against pull requests, and update pull request status based on build result.
Build against pull requests
To build against GitHub pull requests, define a GitHub repository like below:

In repository definition, you may select to build against open, closed, or specified pull requests, and choose to build head, merge, or both of selected build requests like below:
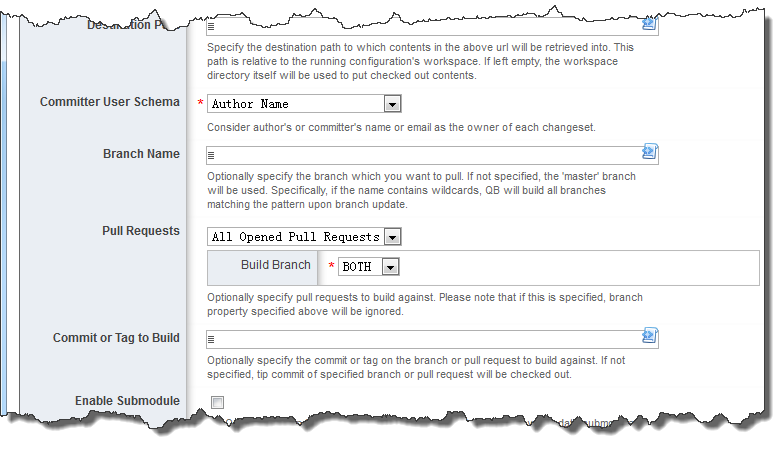
Here head branch of pull request points to tip commit of the pull request, while merge points to merged commit of head commit and tip commit of target branch of the pull request. After defining the Git repository, you should add a checkout step to check it out into the workspace, and add necessary build steps to build against checked out contents.
Upon triggering of configuration using such repository, QuickBuild will first find all matched pull requests at GitHub side and then fire separate build request(s) for each pull request to check changes against that pull request, and build that pull request if necessary. So if there are many matched pull requests, many build requests will be fired. So it is best practice to enable concurrent build to speed up verification of multiple pull requests.
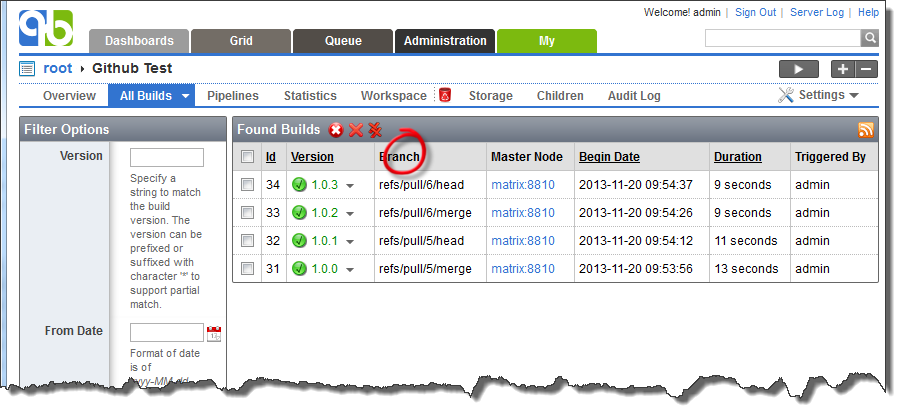
As demonstrated below, each finished build will display associated pull request as branch information and changes of the build will be calculated against previous build with the same pull request branch.
Upon manual triggering of such configuration, all matched pull requests will be built even if they've not being updated, just like what QuickBuild behaves when trigger configurations using normal repositories. However if you schedule the configuration and set build condition to If changes found in referenced repositories (or something similar), QuickBuild will only build against new/updated pull requests.
Update pull request status at GitHub side based on build status
When build against head branch of GitHub pull requests, QuickBuild will update pull request status automatically to reflect build status when build is started/finished, as demonstrated below:
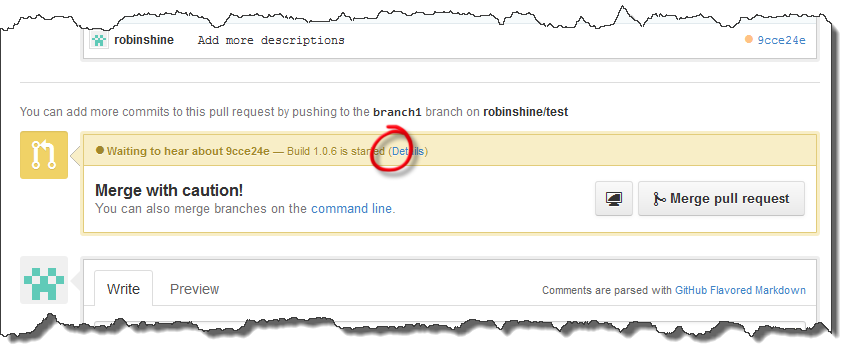
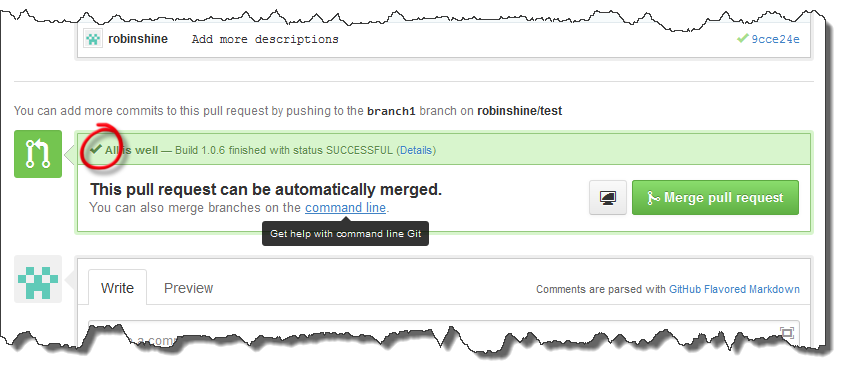
To make this working, make sure head branch of relevant pull requests are getting built as pull request status reflects head commit status.
GitHub Webhook Integration
QuickBuild can trigger builds via GitHub webhooks since 9.0.
Config GitHub
To enable the webhook, first you need go to GitHub repository webhook settings page to configure the QuickBuild side related information:
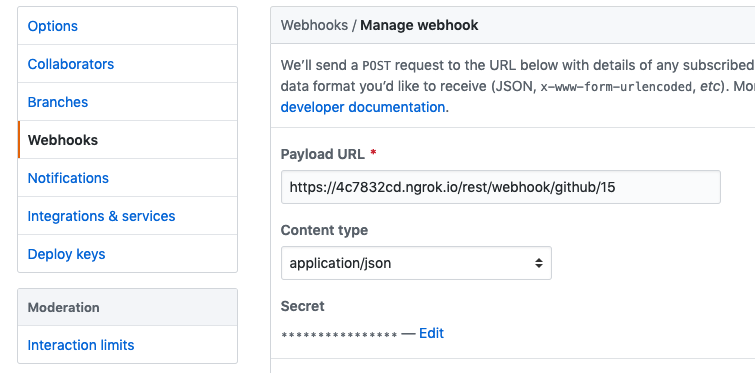
If you want to use some custom parameters, you can add them to your webhook url like below:
https://your.quickbuild.com/rest/webhook/github/14?target=android
Then, later you can use target parameter in your trigger condition.
Config QuickBuild
Add anonymous group
As the webhook is triggered without authentication, anonymous group should be added and it should have the permission to use RESTful API.
Add webhook settings
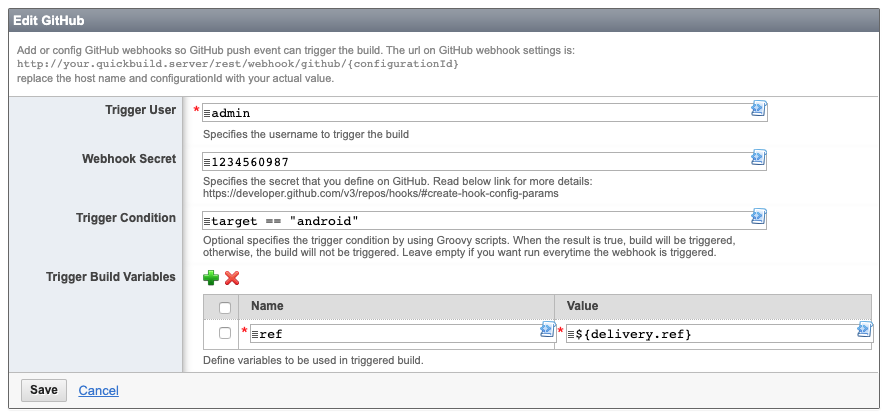
QuickBuild only allow push event to trigger the builds, other events will be ignored. To add integration at QuickBuild side, please go to configuration settings page and then choose Webhook -> GitHub from right side menu:

Then, you can add the settings:
- Trigger User the user to trigger the build
- Webhook Secret the secret should be the same as what you defined in GitHub
- Trigger Condition the trigger condition in Groovy scripts, when the result is true, build will be triggered, otherwise, the build will not be triggered. You can use variable delivery to access the data from GitHub like delivery.ref , delivery.pusher.name . See more details on GitHub Events and Payloads page. You can also use the parameter specified in webhook URL as aforementioned.
- Trigger Build Variables define the variables to trigger the builds so you can use those variables in the steps later.