SCM Support Overview
Introduction
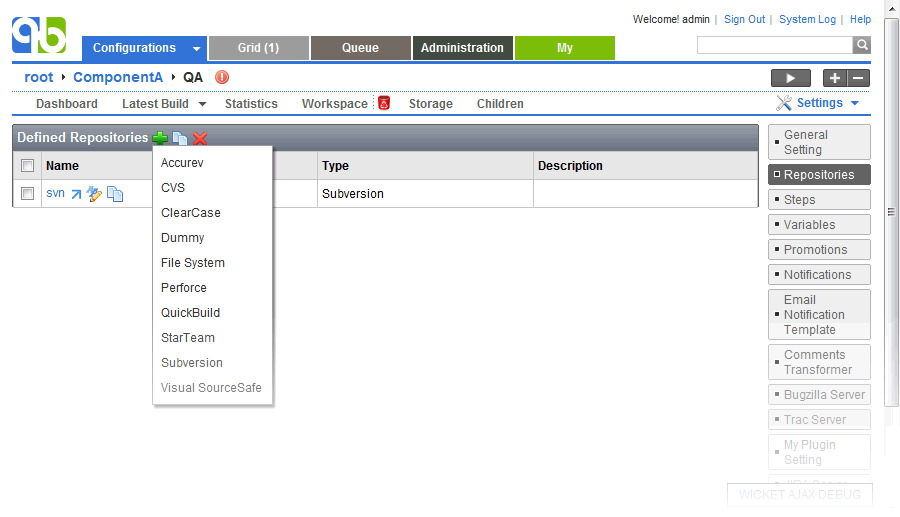
SCM systems are modeled as repositories in QuickBuild. To define repository for a configuration, please select the configuration and switch to repository setting page. The repository menu will be displayed to let you choose the repository type if you click the add button from there, as demonstrated below:
After a repository is defined, you can add repository related steps from Repository category of step menu. Before going further, let's define below concepts:
- repository snapshot
Repository snapshot represents a fixed set of source code in the repository, that is not affected by new checkins - repository revision
Repository revision is used by QuickBuild to identify repository snapshot. It has different meaning for different SCM:- for Subversion: it is the revision number of the repository
- for Perforce: it is the changelist number of the repository
- for Accurev: it is transaction number of the repository
- for other repositories: it is timestamp of the repository
Currently below steps can be used to interact with a repository, respectively:
- checkout step
This step can be added by selecting Repository -> Checkout from step menu, and it lets you choose a repository to checkout. This is the only way to checkout files from SCM in QuickBuild. When this step runs, QuickBuild automatically takes a snapshot of the repository so that later steps (for example, the label step) operate on the same set of source code used for checkout. - label step
This step can be added by selecting Repository -> Label from step menu, and it lets you choose a repository to create label on. This step is useful if you want to label the SCM for the set of source code used for the build. This step will also take a snapshot of the repository. - take snapshot step
This step can be added by selecting Repository -> Take Snapshot from step menu, and it allows you choose a repository and take a snapshot against that repository. The revision number of the repository object defined in QuickBuild will be set to a fixed value after a snapshot is taken. - record changes step
This step can be used to record changes of a repository without actually checking it out.
Examples
With these steps, you can design very flexible workflow when interacting with SCM. You can even define multiple repositories, and checkout/label all of them in a single build.
Here are some examples:
Checkout source code for build, and label it if build and test is successful
- Define your repository.
- Define a checkout step to checkout from your repository.
- Define necessary steps to build and test your code.
- Define a label step to label the repository that is used for checkout.
- Define the master step as a sequential step to include steps defined above.
Create a label on SCM trunk, and checkout against that label for build
- Define your repository.
- Define a label step to label the repository.
- Define a checkout step to checkout from the labeled repository.
- Define necessary steps to build and test your code.
- Define the master step as a sequential step to include steps defined above.
Checkout different part of the project from different machines in parallel, but use the same repository revision
Let's assume that in your SCM, the project is represented by project1 , and it has two modules project1/componentA and project1/componentB
-
Define a repository representing project1.
-
Define two repositories representing project1/componentA and project1/componentB respectively. Revision of both repositories should be set as:
${repositories.get("project1").revision} -
Add a step to take snapshot of repository project1.
-
Add two steps to checkout from repository componentA and componentB . You may arrange these two steps running on different machines using node match condition (refer to build grid documentation).
-
Add a parallel composition step to run the checkout steps in parallel.
-
Define the master step as a sequential step to include the take snapshot step and the parallel composition step defined above.