Integrating QuickBuild with TeamForge
The integration features:
- Hyperlink TeamForge artifacts in commit message to corresponding TeamForge pages
- Generate an issues report from commit messages
- Display the modifications of each issue
- Update TeamForge tracker artifacts based on
- commit commands in the commit messages
- a list specified manually
- a specified query based on lucene search syntax
- Generate TeamForge tracker artifacts based on the build or step status
- Create a release to TeamForge File Releases along with:
- Updating "Fix in Release" fields
- Updating specified fields of TeamForge tracker artifacts
- Publishing files to the release
- Upload files to TeamForge documents
- Delegate user management to TeamForge logins. (NOTE if you are using LDAP as TeamForge authenticator, please also use LDAP authenticator instead.)
NOTE Supported Team Forge version should be TeamForge 5.4 or higher.
Below we will describe how to integrate with TeamForge.
- Basic Integration
- Create TeamForge Artifact
- Create TeamForge Release
- Update TeamForge Artifacts
- Upload Files to TeamForge Documents
- Supported TeamForge Artifact Attributes
- Delegate user management to TeamForge logins
- Integrate with Orchestrate
Basic Integration
In configuration setting > Issue Tracker > TeamForge Server, you can define the TeamForge setting like below:
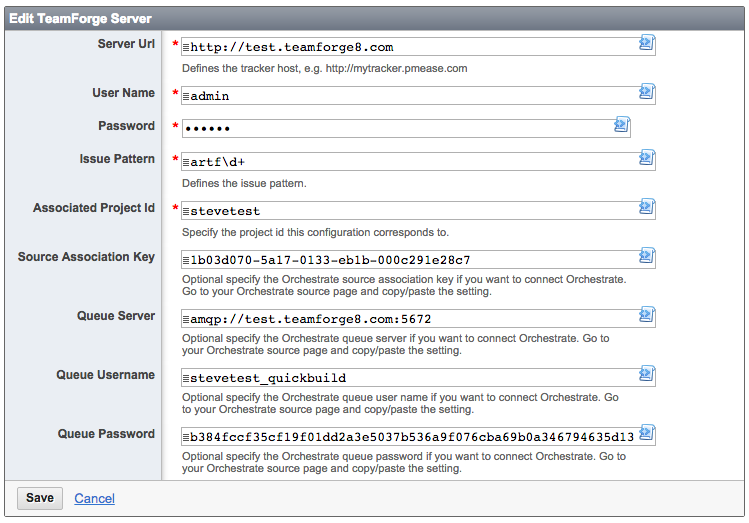
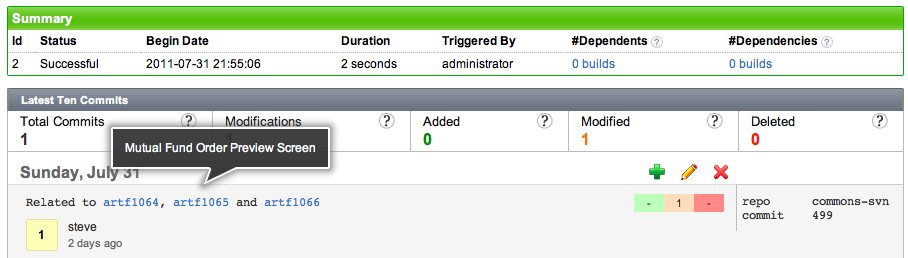
After the setting defined, the QuickBuild can generate the issues report automatically based on your commit messages, moreover, all TeamForge tracker artifact ids occurred in commit messages are hyperlinked.
TeamForge Issues Report
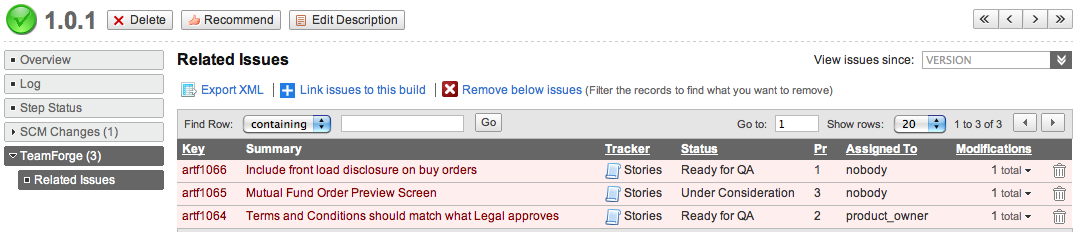
Artifacts link in commit messages
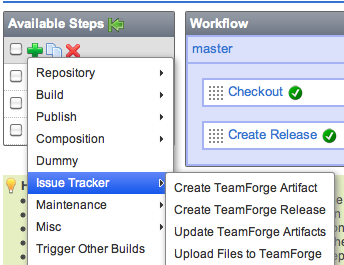
And now below steps are available for you to add to your workflow:
- Create TeamForge Artifact
- Create TeamForge Release
- Update TeamForge Artifacts
- Upload Files to TeamForge
Create TeamForge Artifact
In your configuration workflow definition, you can add one or more "Create TeamForge Artifact" step to create TeamForge artifacts based on the build status or step status.
Create TeamForge Release
In your configuration workflow definition, you can add a "Create TeamForge Release" step to create a release in the specified package. The step can also help you to update the "Fixed in Release" field of specified TeamForge artifacts, moreover, you may update extra fields via "extra attributes".
Also, you may upload files based on "File Pattern" to the release.
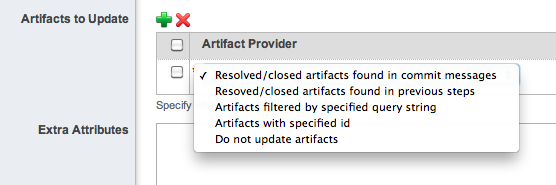
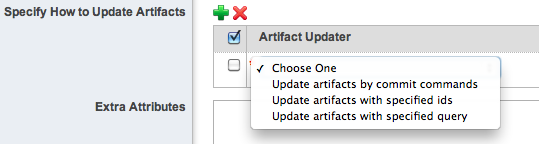
Update TeamForge Artifacts
In your configuration workflow definition, you can add a "Update TeamForge Artifacts" step to update the TeamForge tracker artifacts. The artifacts are provided from commit message, from a specific list, or from a lucene search.
Upload Files to TeamForge Documents
In your configuration workflow definition, you can add a "Upload Files to TeamForge" step to upload files to TeamForge documents.
Supported TeamForge Artifact Attributes
Besides the attributes you need input in the step, you may specify extra attributes with below format line by line:
attribute name=attribute value
Below lists all supported attributes:
| Attribute Name | Description |
|---|---|
| title | The title of the artifact |
| description | The description of the artifact |
| group | The group of the artifact |
| category | The category of the artifact |
| status | The status of the artifact |
| customer | The customer of the artifact |
| estimatedEffort | The estimated effort of the artifact. Number only. |
| remainingEffort | The remaining effort of the artifact. Number only. |
| autosumming | Whether auto summing the effort or not. true or false. |
| assignee | The assignee of the artifact |
| fixedIn | The release id this artifact is fixed in |
| comment | The comment for updating the artifact |
Flex/Custom Fields
The flex/custom fields are also supported, you need add a prefix "flex:" to the custom field name. For example, you have a custom field named My Custom1, and if you want to specify the value, you need write like:
flex:My Custom1=Some value
When you update TeamForge artifact via commit command, you need replace all space to underscore "_", for example:
Fix artf1100 --flex:My_Custom1 Some value
Delegate user management to TeamForge logins
To delegate user management to TeamForge is very easy, just go to Administration page and select Authenticators page, then add a TeamForge authenticator and QuickBuild will use TeamForge logins to authenticate the users.
Integrate with Orchestrate
-
To integrate with Orchestrate, first, you need enable Orchestrate feature in TeamForge, please refer to the TeamForge documentation for details.
-
After Orchestrate is enabled in your project, go to Orchestrate page and click Manage Source button, you will see below page:
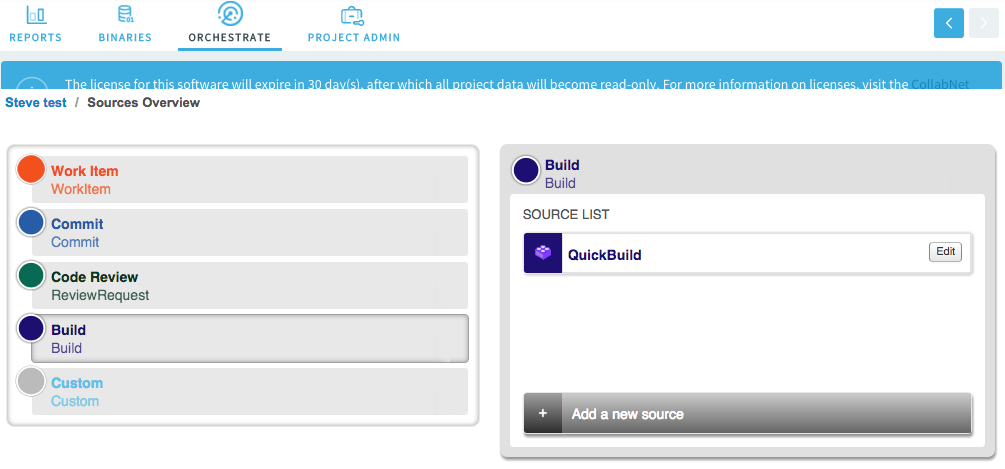
- Choose Build category and click button Add a new source, so you can add QuickBuild source like below:
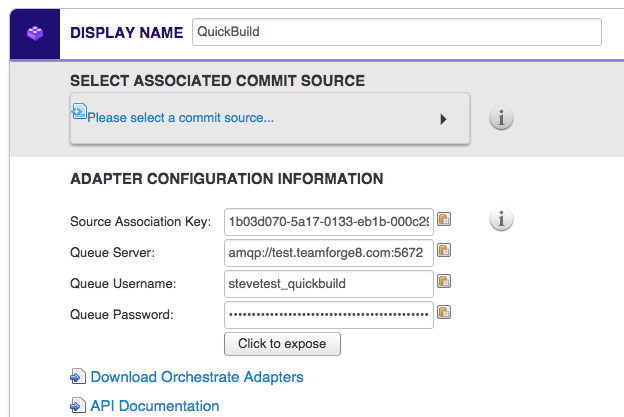
- Now, copy and paste the settings to our QuickBuild TeamForge server:
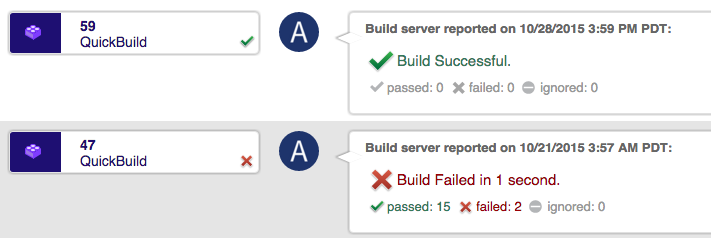
- After adding Orchestrate successfully, each time the build is finished, QuickBuild will post a message to Orchestrate and you will see the message in Orchestrate like below: