|
QuickBuild2 Documentation
|
To publish Findbugs
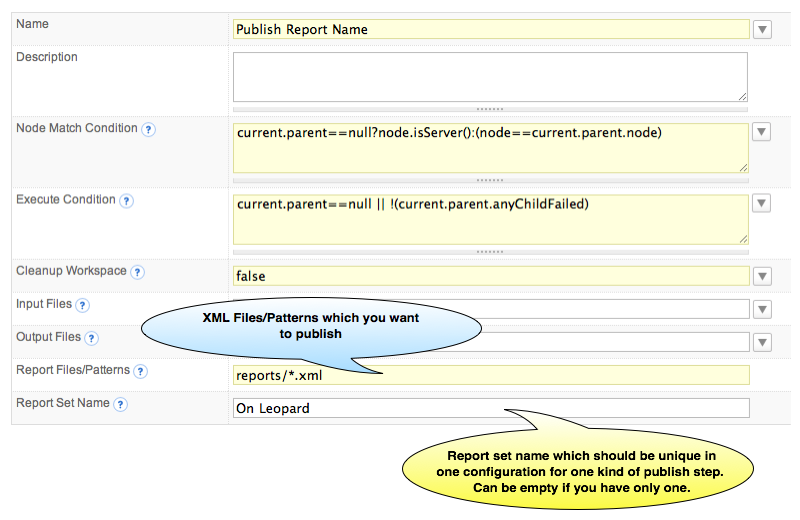
Generate Findbugs ReportQuickBuild will NOT generate Findbugs Findbugs report target in build.xml <taskdef name="findbugs" classname="edu.umd.cs.findbugs.anttask.FindBugsTask" classpath="${findbugs.utils.dir}/findbugs-ant.jar"/> <target name="findbugs" depends="dist,findbugs-xml,findbugs-html"/> <target name="findbugs-xml"> <mkdir dir="${findbugs.reports}"/> <findbugs home="${findbugs.home}" output="xml:withMessages" outputFile="${findbugs.reports}/findbugs.xml" jvmargs="-Xmx512m"> <auxClasspath path="${lib.dir}" /> <sourcePath path="${src.dir}" /> <class location="${dist.dir}/${exe.name}.jar" /> </findbugs> </target> The code snippet will generate the XML reports for each test case, and the reports will be captured to '${findbugs.reports}' directory. Note. The output format should be set to 'xml:withMessages'. Publish Findbugs ReportJust like all other build reports, you add Findbugs report by [adding a publish step] in a configuration. When you add publish Findbugs Report step, the following screen will be displayed:
In Report Files/Pattern field, QuickBuild uses Ant style file patterns to collect the reports, and the directory you specified is relative to the [workspace] directory. |