view page history | view next version >>
Since QuickBuild 10, SonarQube![]() , a continuous code inspection solution, can be added to your continuous integration workflow.
, a continuous code inspection solution, can be added to your continuous integration workflow.
You can trigger SonarQube to analyze your source code by adding a step. The step can be:
- Sonar Scanner Step
- Maven Step
- Gradle Step
- Command line Step
Configuring Webhook
QuickBuild uses Webhook to communicate with SonarQube. So firstly, you need config the webhook both in QuickBuild and in SonarQube.
QuickBuild Side
Go to configuration Settings page, then Webhook tab, you can define the SonarQube settings:
Unable to render embedded object: File (settings.png) not found.
If the "Anyone" pseudo-group does not have permission to perform analyses, you'll need to
supply the credentials of a user with Execute Analysis permission for the analysis to run under. So, you need input Login or Token and Password for authentication. See more details at below page:
https://docs.sonarqube.org/latest/analysis/analysis-parameters/![]()
SonarQube Side
Go to project administration page, create a webhook:
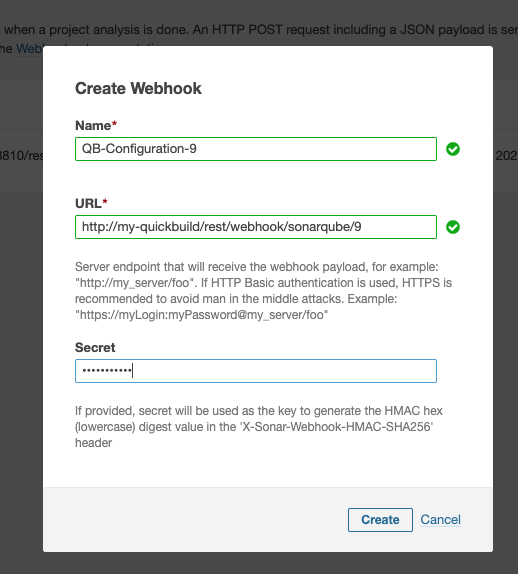
Please make sure the secret is identical to the secret filled in QuickBuild.
The URL is in below format:
Sonar Scanner Step
In your configuration workflow, you can add Sonar Scanner Step to trigger SonarQube to analyze your source code.