Purpose
This tutorial demonstrates how to set up QuickBuild to authenticate via Okta![]() using OpenID protocol
using OpenID protocol
Basic Setup
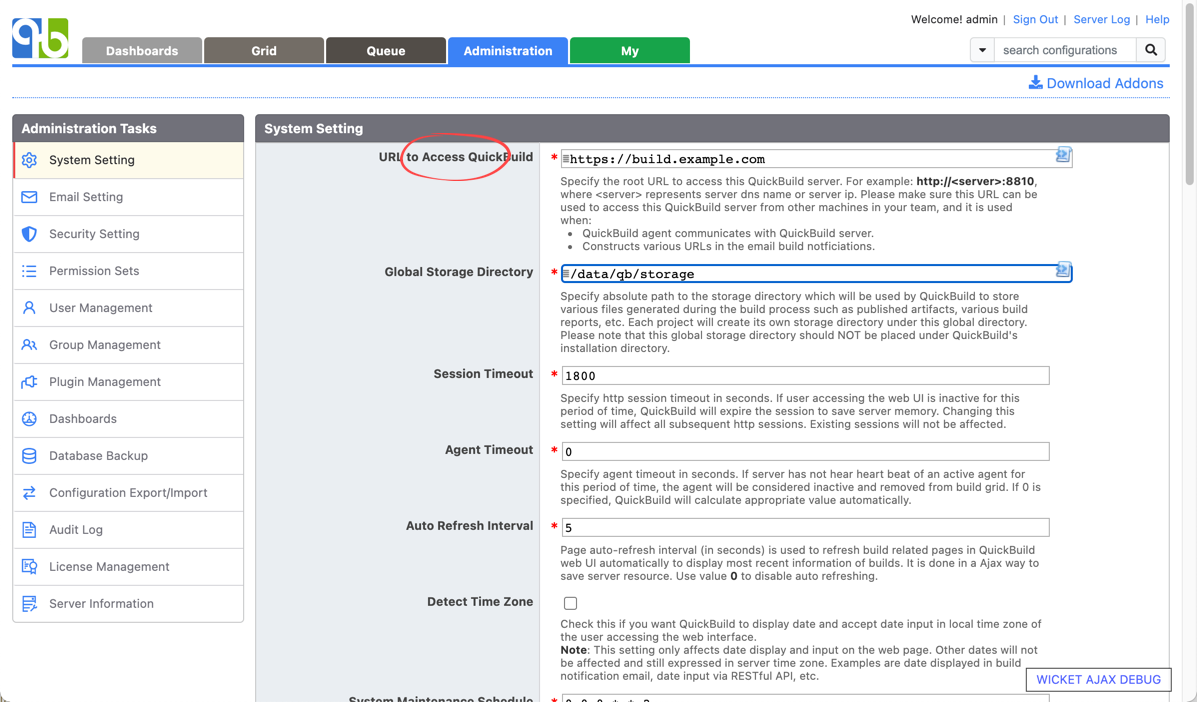
- Make sure your QuickBuild instance is publicly accessible, and configure the public server url in system setting:
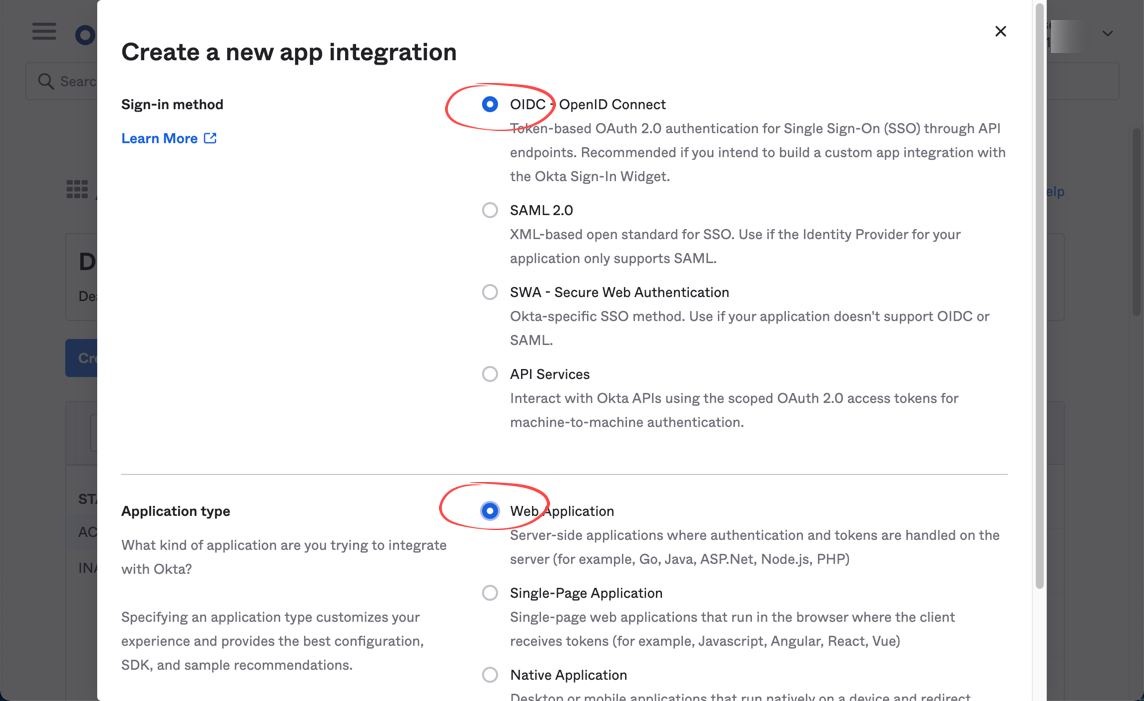
- Login to Okta to add an application integration with sign-in method as OIDC and type as web application
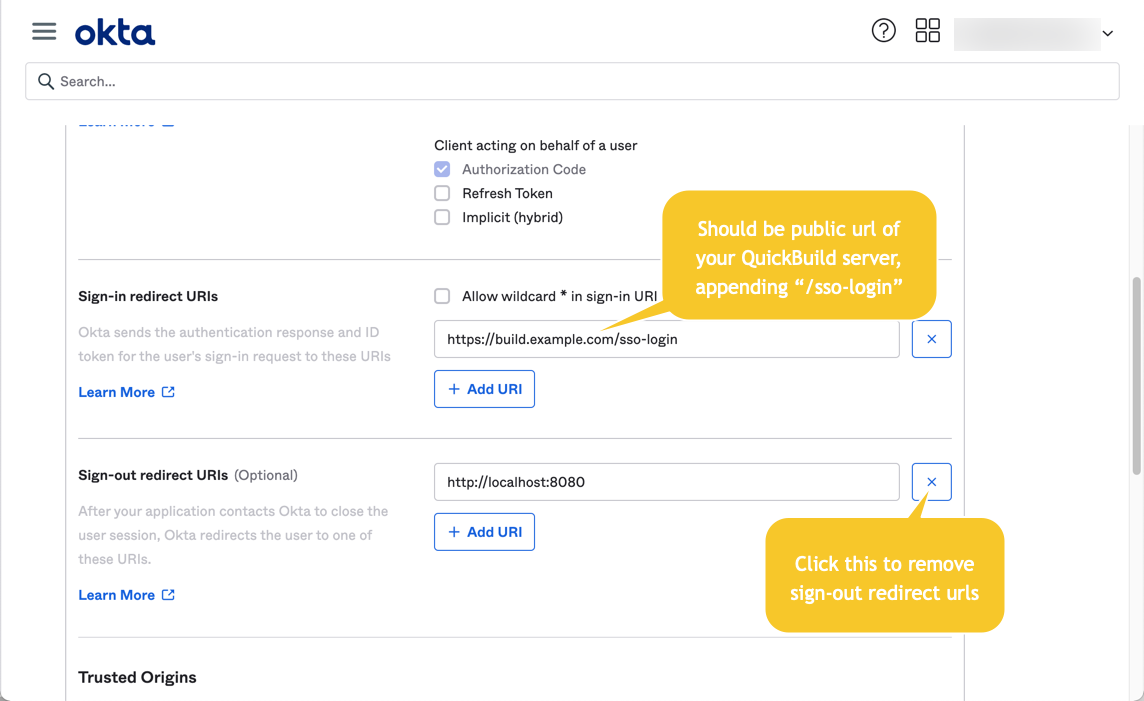
- Continue to set up the application and specify sign-in redirect url as below:
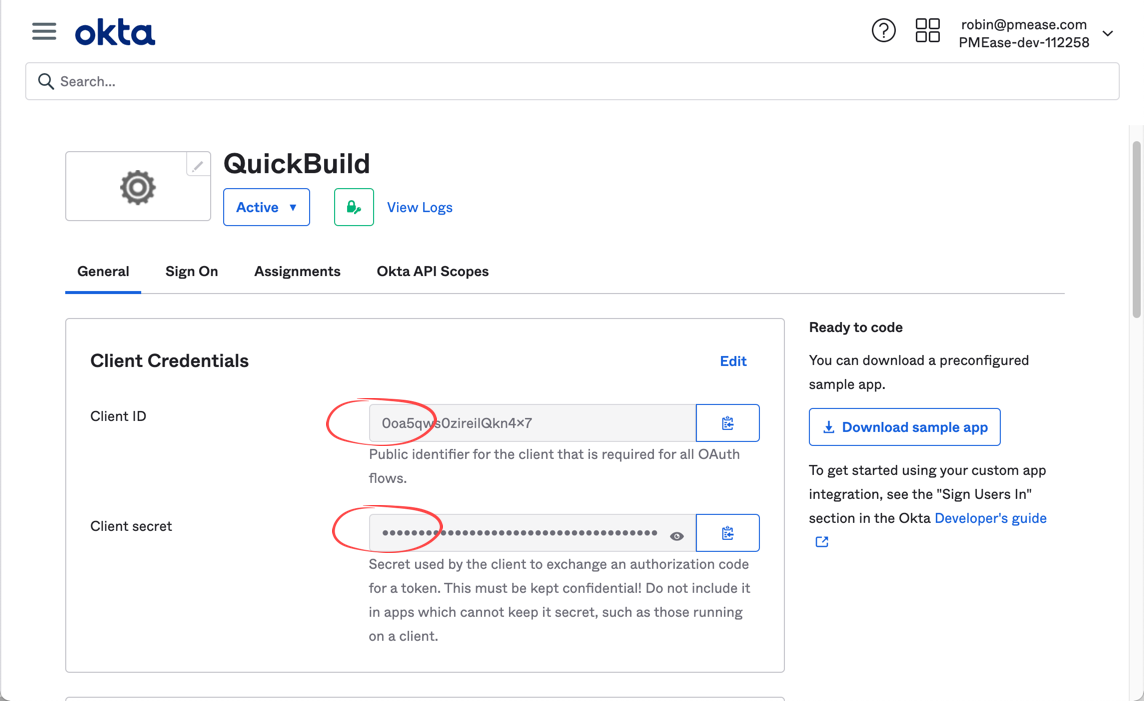
For assignment option in this page, just use Allow everyone in your organization to access for simplicity purpose - Save the application and copy out the client id and client secret to be used later:
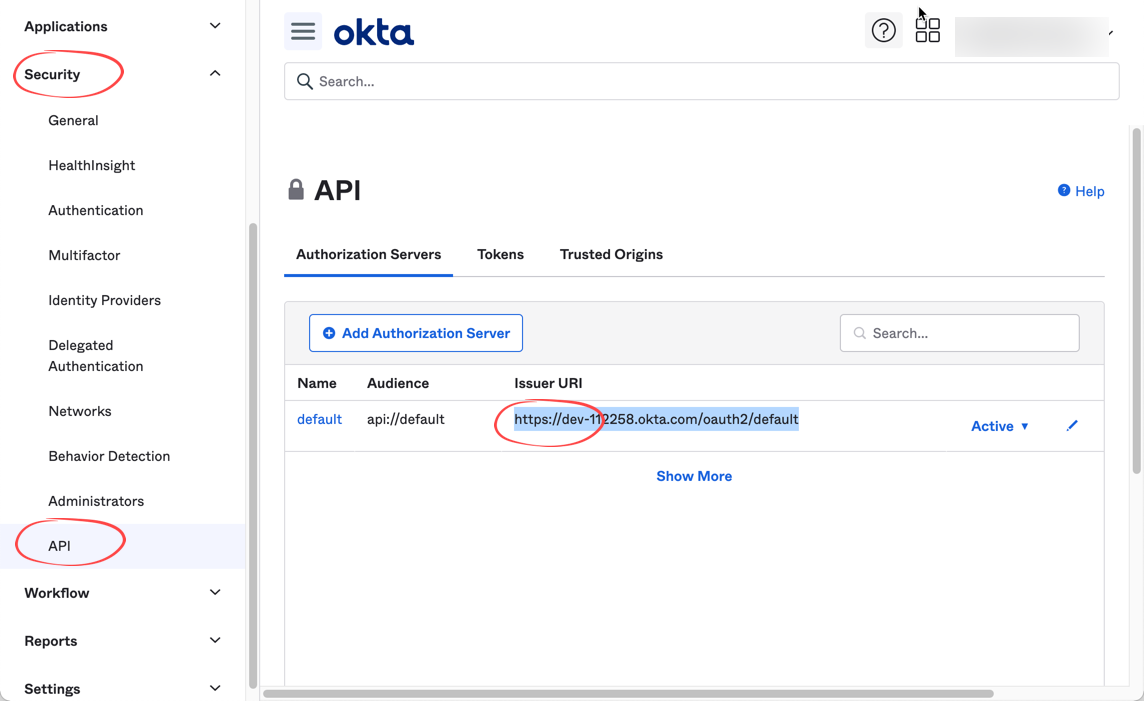
- From Okta menu, select Security/Api to display authorization servers. Copy out the issuer url of default server to be used later:
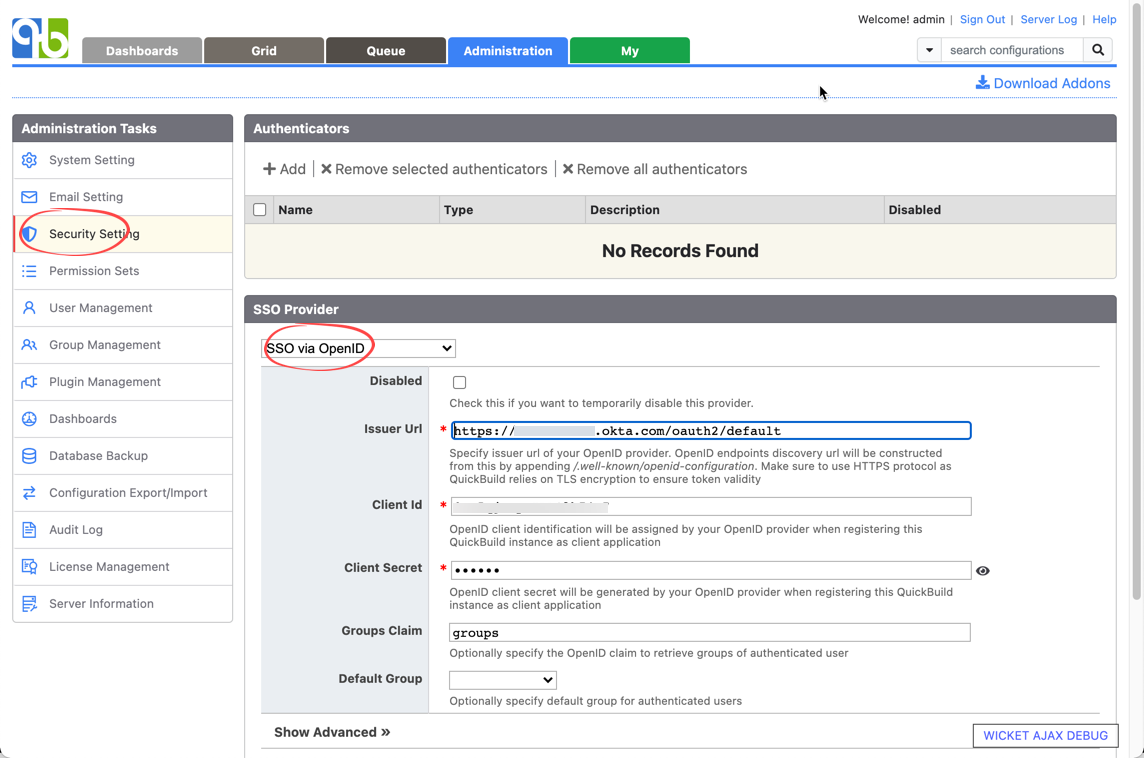
- At QuickBuild side, setup SSO via OpenID like below. Copy issuer url, client id and client secret from Okta. Specify Groups Claim as groups
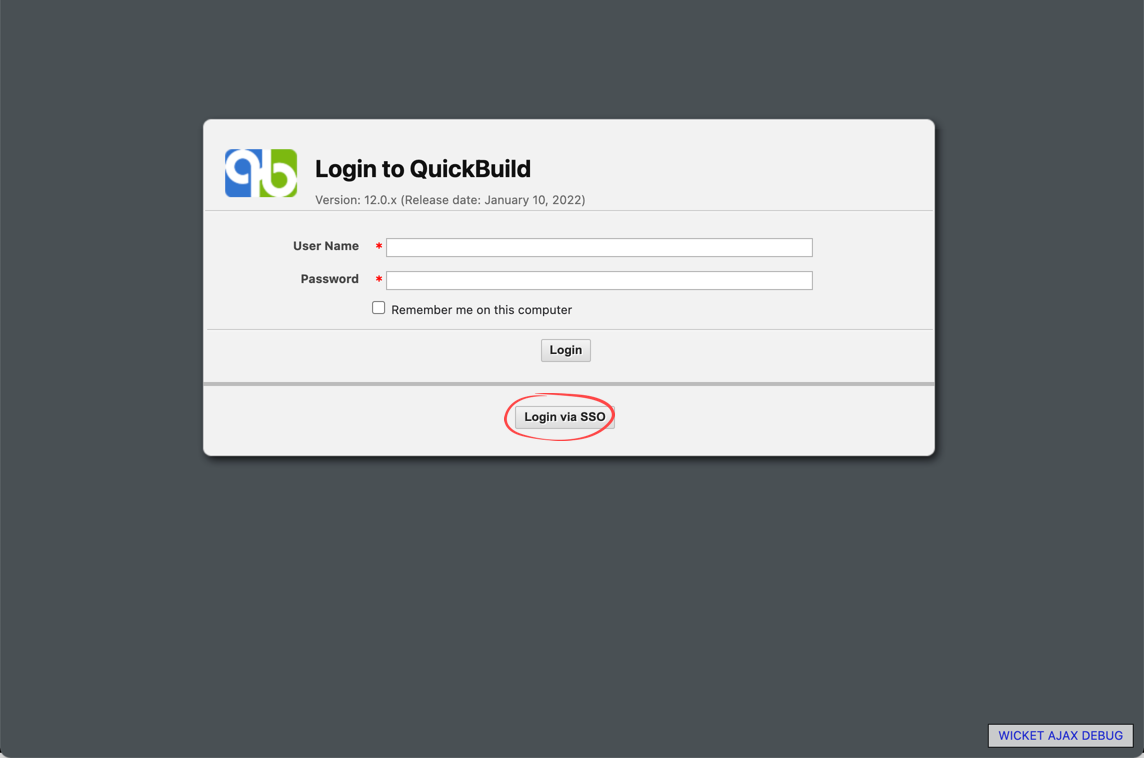
- Save the provider, and sign out QuickBuild. Visit QuickBuild again via the public url, and then you should be able to login via Okta
Authorize Users Based On Okta Group Membership Information
Now we continue to set up Okta to send group membership information so that user can be authorized with appropriate permissions
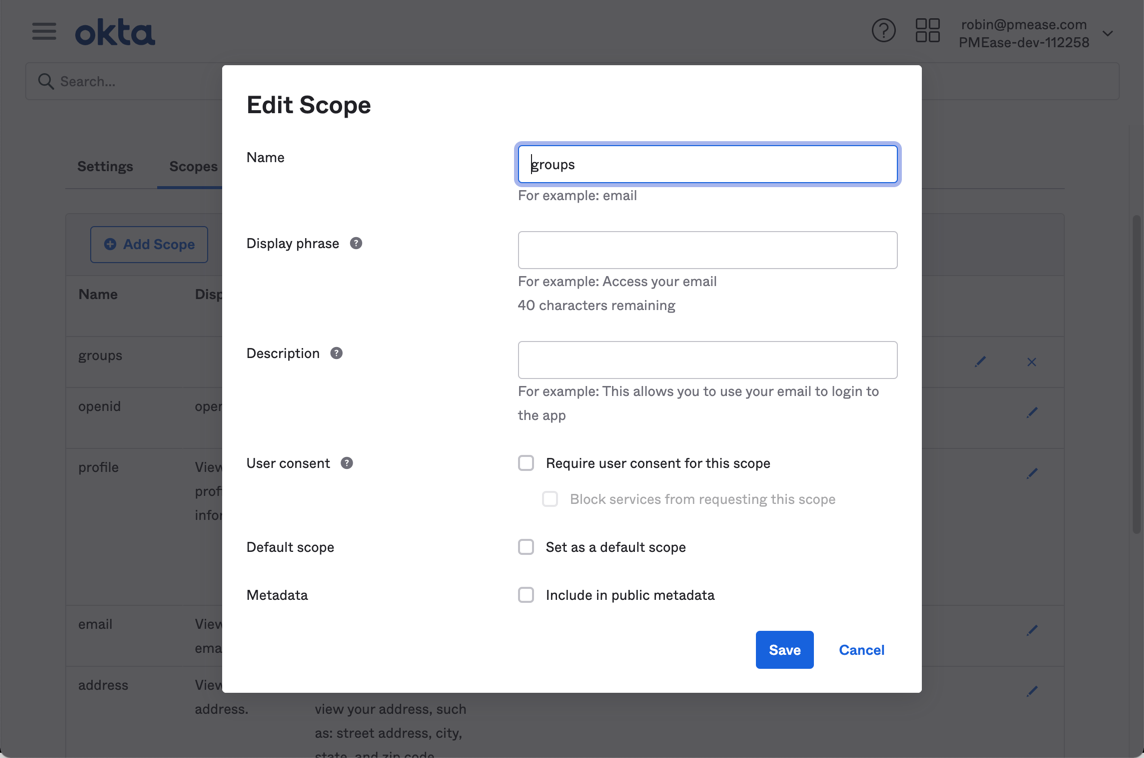
- Visit detail page of the default authorization server we seen before, switch to scopes tab and add a scope of name groups with default options:
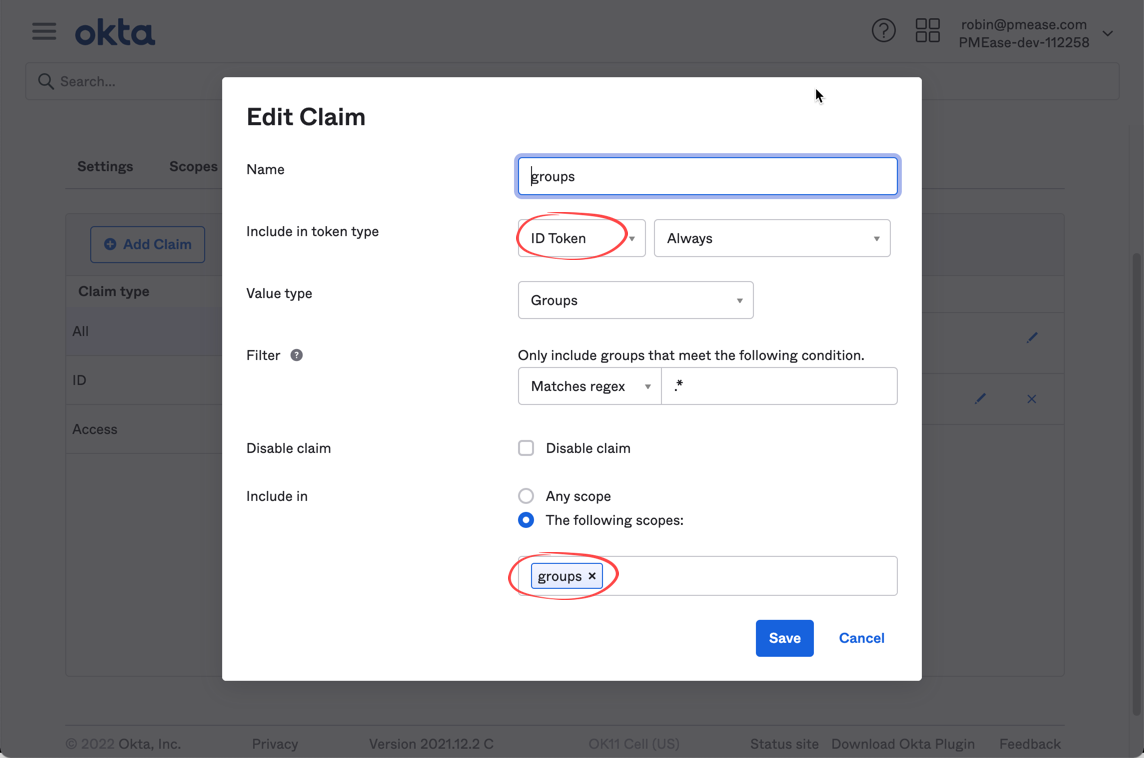
- Switch to claims tab and add a claim of name groups to be included in ID token and groups scope like below:
- At QuickBuild side, switch to group management page, add necessary Okta groups (same name) and assign appropriate permissions
Now users signed in via Okta will be authorized with permissions available in corresponding groups