<< View previous version | view page history | view next version >>
QuickBuild uses Apache Wicket![]() as its presentation layer. However, in most cases, plugin developer does not need to learn Wicket as QuickBuild has an bean editor which is able to automatically generate below UI based on annotations:
as its presentation layer. However, in most cases, plugin developer does not need to learn Wicket as QuickBuild has an bean editor which is able to automatically generate below UI based on annotations:
- Step view/edit UI when you supply new step type.
- Repository view/edit UI when you supply new repository type.
- Plugin setting view/edit UI.
Let's demonstrate this feature by enhancing our helloworld plugin to log the message supplied by user instead of just a hard coded "hello world". To do so, we create another class MyAnotherStep.java like below (Do create a new class instead of modifying MyStep.java as we do not want to delve into migration at this time):
package com.example.myplugin;

import org.hibernate.validator.NotEmpty;

import com.pmease.quickbuild.Context;
import com.pmease.quickbuild.annotation.Editable;
import com.pmease.quickbuild.annotation.Scriptable;
import com.pmease.quickbuild.stepsupport.Step;

@Editable(category="examples", name="print message",
		description="This step prints an user defined message into the build log.")
public class MyAnotherStep extends Step {

	private static final long serialVersionUID = 1L;

	private String message;

        // UI annotations must be applied to the getter method
	@Editable(order=100, name="Your Message", description="Specify your message here.")
	@NotEmpty
	@Scriptable
	public String getMessage() {
		return message;
	}

	public void setMessage(String message) {
		this.message = message;
	}

	@Override
	public void run() {
		Context.getLogger().info(getMessage());
	}

}
And modify MyPlugin.java to include this newly created step type as another extension:
package com.example.myplugin;

import com.pmease.quickbuild.extensionpoint.StepProvider;
import com.pmease.quickbuild.pluginsupport.AbstractPlugin;
import com.pmease.quickbuild.stepsupport.Step;

public class MyPlugin extends AbstractPlugin {

	@Override
	public Object[] getExtensions() {
		return new Object[] {
			new StepProvider() {

				@Override
				public Class<? extends Step> getStepClass() {
					return MyStep.class;
				}

			},
			new StepProvider() {

				@Override
				public Class<? extends Step> getStepClass() {
					return MyAnotherStep.class;
				}

			}

		};
	}

}
Save these classes, and start QuickBuild from Eclipse. You should now be able to see a new step type print message in the examples category. Edit this step by adding it to build execution sequence. Below UI will be presented:
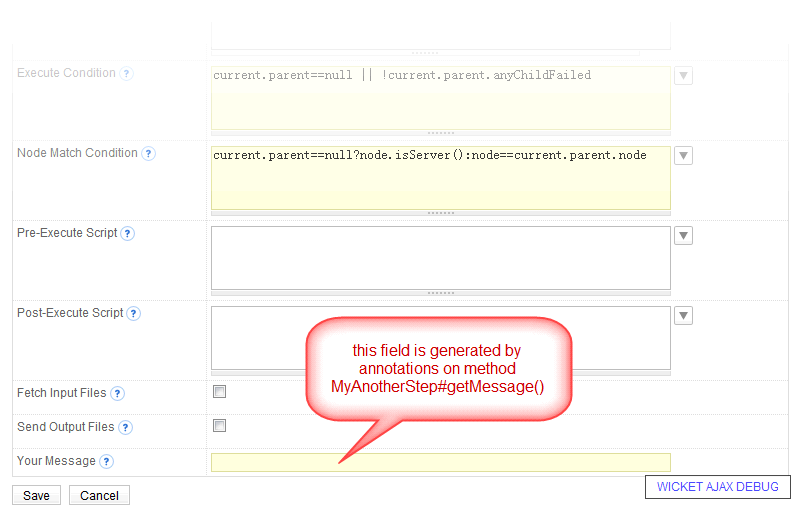
Run the build and your supplied message will be printed into build log.
Now let's look at annotations applied to method MyAnotherStep#getMessage():
- The annotation @Editable marks a field as editable and defines display name, order, and description of the field. These attributes are optional:
- If name is left empty, the field name will be used.
- If description is left empty, no description will be displayed when you edit the property.
- If order is left empty, a default value of MAX_INTEGER will be assumed.
- @NotEmpty is an optional constraint annotation telling QuickBuild that this field does not accept an empty value.
- @Scriptable is optional and is normally applied to field of String type. It allows the field to make use of QuickBuild's scripting facility. For example, when define the print message step, you may specify the message as hello ${user.name} to say hello to current QuickBuild user. Scriptable field needs to be accessed through getter method; otherwise the embedded scripts will not be executed. Method MyAnotherStep.java#run() obeys this rule by executing Context.getLogger().info(getMessage()); instead of Context.getLogger().info(message);.